With the latest OpenWRT versions a new system for building the web interface came up. It doesn't need lua anymore and rendering and computing is done by the client (aka your browser). So our routers just need to provide the data and can focus on their actual tasks.
luci-app-example
Unfortunately a lot of older LuCI apps aren't migrated right now. So easy examples are missing on how to build LuCI apps. That's something we wanted to change, so we built a little example app that includes the most important things.
This apps provides two pages in the admin backend:
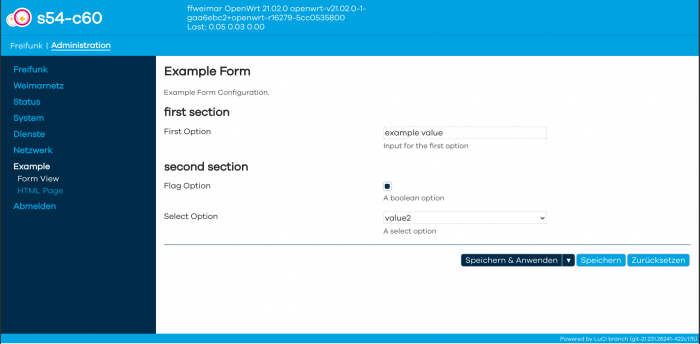
- A form page that allows to configure an example object
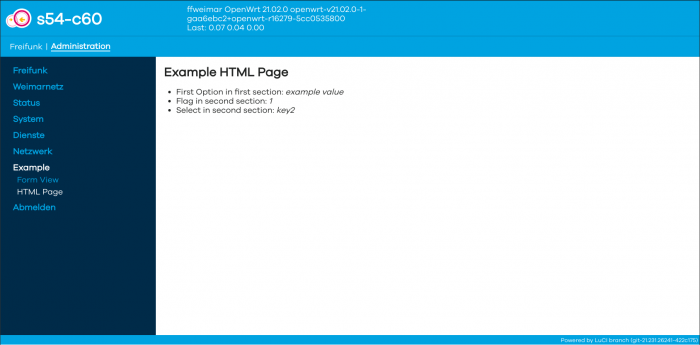
- A html page that just shows some configured values
- Internationalization is included, too.
The form:

The html page:

How to build your own app
In root/usr/share/rpcd/acl.d/luci-app-example.json you grant all the access your app needs to work. In OpenWRT's ubus docs you can learn how that file works. Please consider to apply the principle of least privilege.
In root/usr/share/luci/menu.d/luci-app-example.json you define where your view will be mounted in the menu.
With root/etc/uci-defaults/80_example we just ensure to create a simple config file for our example app after installation.
    ...
    "admin/example/form": {
        "title": "Form View",
        "order": 1,
        "action": {
            "type": "view",
            "path": "example/form"
        }
    },
    ...
Everything else we do in htdocs/luci-static/resources/view/example. For every view we create a .js file here, the name we defined with the path property in the menu file.
Forms and HTML pages
Everything is done now in javascript. You can find all classed and methods in the API docs.
If we just want to configure services or other things that are defined straightforward in /etc/config, we can use forms, that will render everything automatically.
        var m, s, o;

        m = new form.Map('example', _('Example Form'),
                 _('Example Form Configuration.'));

        s = m.section(form.TypedSection, 'first', _('first section'));
        s.anonymous = true;

        s.option(form.Value, 'first_option', _('First Option'),
             _('Input for the first option'));

        ...

        return m.render();
See LuCI.forms docs for more details.
To have more flexible pages, we can describe the html body on our own.
var body = E([
      E('h2', _('Example HTML Page'))
    ]);
    var sections = uci.sections('example');
    var listContainer = E('div');
    var list = E('ul');
    list.appendChild(E('li', { 'class': 'css-class' }, ['First Option in first section: ', E('em', {}, [sections[0].first_option])]));
    list.appendChild(E('li', { 'class': 'css-class' }, ['Flag in second section: ', E('em', {}, [sections[1].flag])]));
    list.appendChild(E('li', { 'class': 'css-class' }, ['Select in second section: ', E('em', {}, [sections[1].select])]));
    listContainer.appendChild(list);
    body.appendChild(listContainer);
    console.log(sections);
    return body;
We can of course use all the LuCI API methods. It is also possible to use and override the save and apply buttons.
Conclusion
With this example app it will be easier to develop new or migrate older LuCI apps. So we hope we can get rid of luci-lua dependencies to create smaller images and have faster routers.


